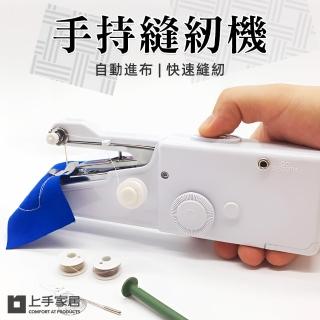
🧵 衣服破洞、線頭散開怎麼辦?手持電動裁縫機的痛點解決流程
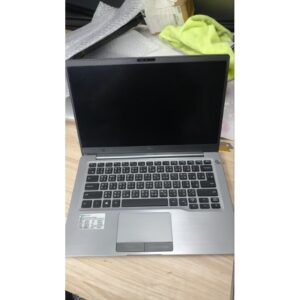
你有沒有遇過這種狀況:衣服只是小破洞或線頭散開,但每次穿出門都覺得不舒服;想拿去修又覺得麻煩。手持電動裁縫機 小型縫紉迷你縫紉機 的價值就在於「把修補變得可執行」。下面針對三個最常見痛點,給你一套更容易成功的做法。

你可能正在遇到的狀況
破洞位置不規則、線頭散得很開,你一開始就想「直接縫起來」,結果走線不順。
解法:先整理,再定位
- 先把破洞周圍的散線整理回去,讓布料邊緣看起來更接近原形。
- 用眼睛找出「最接近原縫線的位置」,把起點定在那裡。
- 先在邊角做短縫確認方向,再延伸到主要位置。
帶有依據感的提醒:縫製成敗常與「起點與走線方向」高度相關。當你先定位好,後續就比較不會越縫越偏。
解法:把速度交給機器,把平整交給手
手持電動裁縫機的電動驅動會讓縫製節奏更一致。你需要做的是讓布料保持平整,避免皺摺或拉扯。
可以用這個生活比喻:像你在貼壁紙,手要負責把氣泡擠掉、讓表面平;機器則負責把線走得更穩。
解法:起收要牢靠,別只顧中間
很多人只把注意力放在破洞中間,卻忽略起收。你可以把起收想成「門的鉸鏈」:鉸鏈不牢,門再漂亮也會晃。
- 起針放慢,讓線落位後再往前走。
- 收尾時把線頭固定在縫線附近,避免直接留在邊緣。
- 若是線頭散開的縫線,先把散線整理回原位再縫,會更耐看也更耐用。
簡單來說,手持電動裁縫機能提供較一致的縫製節奏,降低「手動節奏不穩」造成的線距差異;而你在痛點解法中做的事(整理邊緣、定位起點、保持平整、加強起收)則是在處理縫製的關鍵變因。當變因變少,成功率自然更高。
FAQ:修補後常見疑問
Q1:破洞太不規則怎麼辦?
可以先把邊緣整理接近原樣,再分段縫製。若你覺得某段特別難對齊,就先做短縫固定,再慢慢延伸。
Q2:修補後會不會很明顯?
明不明顯通常跟走線平整度與起收整齊度有關。先練習短縫、再處理明顯位置,通常能改善觀感。
Q3:哪些布料比較需要耐心?
多層堆疊或厚薄差較大的地方,通常更需要慢一點與分段處理。你可以先從較薄或較簡單的部位練起。
如果你有類似需求,可以進一步看看這類商品的規格與評價
每款手持電動裁縫機在操作細節上會有差異。你可以把自己最常遇到的破洞位置與布料類型整理好,再參考實際使用回饋,選到更符合你生活修補節奏的那一款。
📌 為什麼這類產品會有效?
一般來說,這類產品的設計原理是透過改善日常使用過程中的某些關鍵因素,例如減少空氣接觸、降低水分流失或優化使用流程。簡單來說,就是讓原本容易被忽略的小細節變得可控。
English Version
Loose Threads and Small Tears: A Practical Fix Workflow with a Handheld Electric Sewing Machine
Many people don’t repair clothes because they’re unsure where to start, afraid of making it worse, or worry the fix won’t last. This guide targets the most common issues—starting, neatness, and durability—with a simple handheld electric sewing workflow.
1) Pain point: not knowing where to start
For irregular tears, start by tidying loose threads and aligning the fabric edges as closely as possible. Then choose a clear starting point and do short test stitches before committing to the main seam.
2) Pain point: messy or more noticeable repairs
Keep the fabric smooth and flat while the handheld electric machine provides a steadier stitching rhythm. Think of it like smoothing out wrinkles—your job is to remove the “bumps” that distort the line.
3) Pain point: repairs that don’t last
Durability often depends on the start and finish. Slow down at the beginning, and secure the thread ends near the stitch line so they don’t loosen at the edge.
4) Simple principle: why this workflow works
In simple terms, the electric drive helps keep the stitching rhythm consistent, while your steps (edge prep, stable fabric, and secure start/finish) reduce the variables that cause failures.