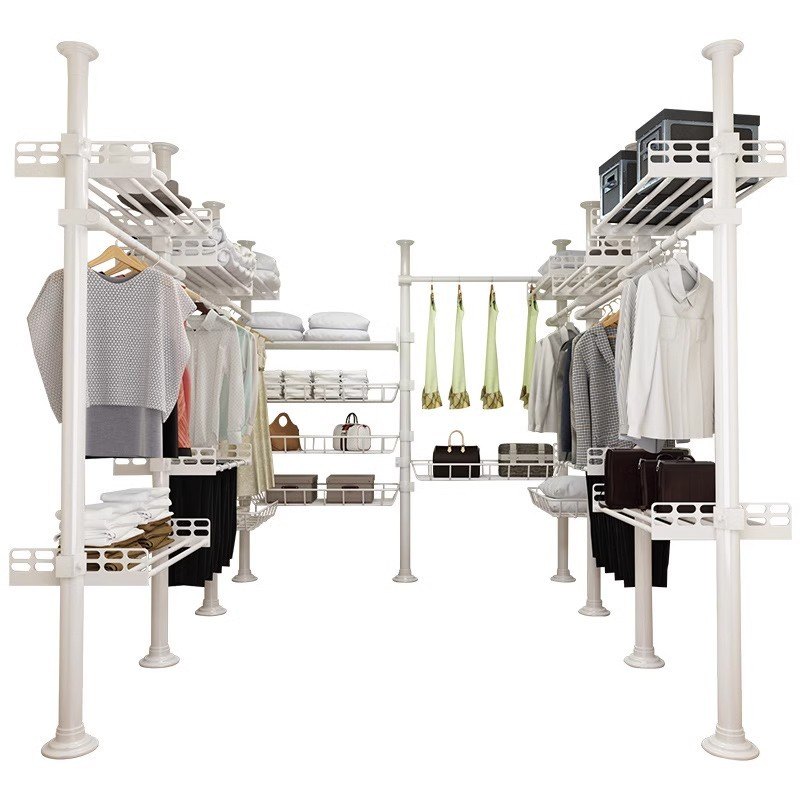
No-Drill Freestanding Clothes Rack Installation Guide: Step-by-Step for First-Time Users
Follow a simple step-by-step process to install a freestanding no-drill drying rack. Learn how to choose placement, adjust height, use 360° rotation, and distribute weight safely.
Step 1: Choose the right placement
Pick a well-ventilated spot near a window or where sunlight can reach. Since the wings can rotate, you can fine-tune the angle later.
Step 2: Assemble without drilling
This rack is designed for no-drill setup and tool-free installation. It’s also meant to be disassembled for easier relocation.
Step 3: Adjust height and rotate the wings
Use the adjustable height concept to match different garment lengths, then use the 360° rotating wings to align with airflow and sunlight.
Step 4: Weight distribution check
Refer to the product’s load guidance (main pole and per-wing capacity) and avoid concentrating heavy items on a single side.